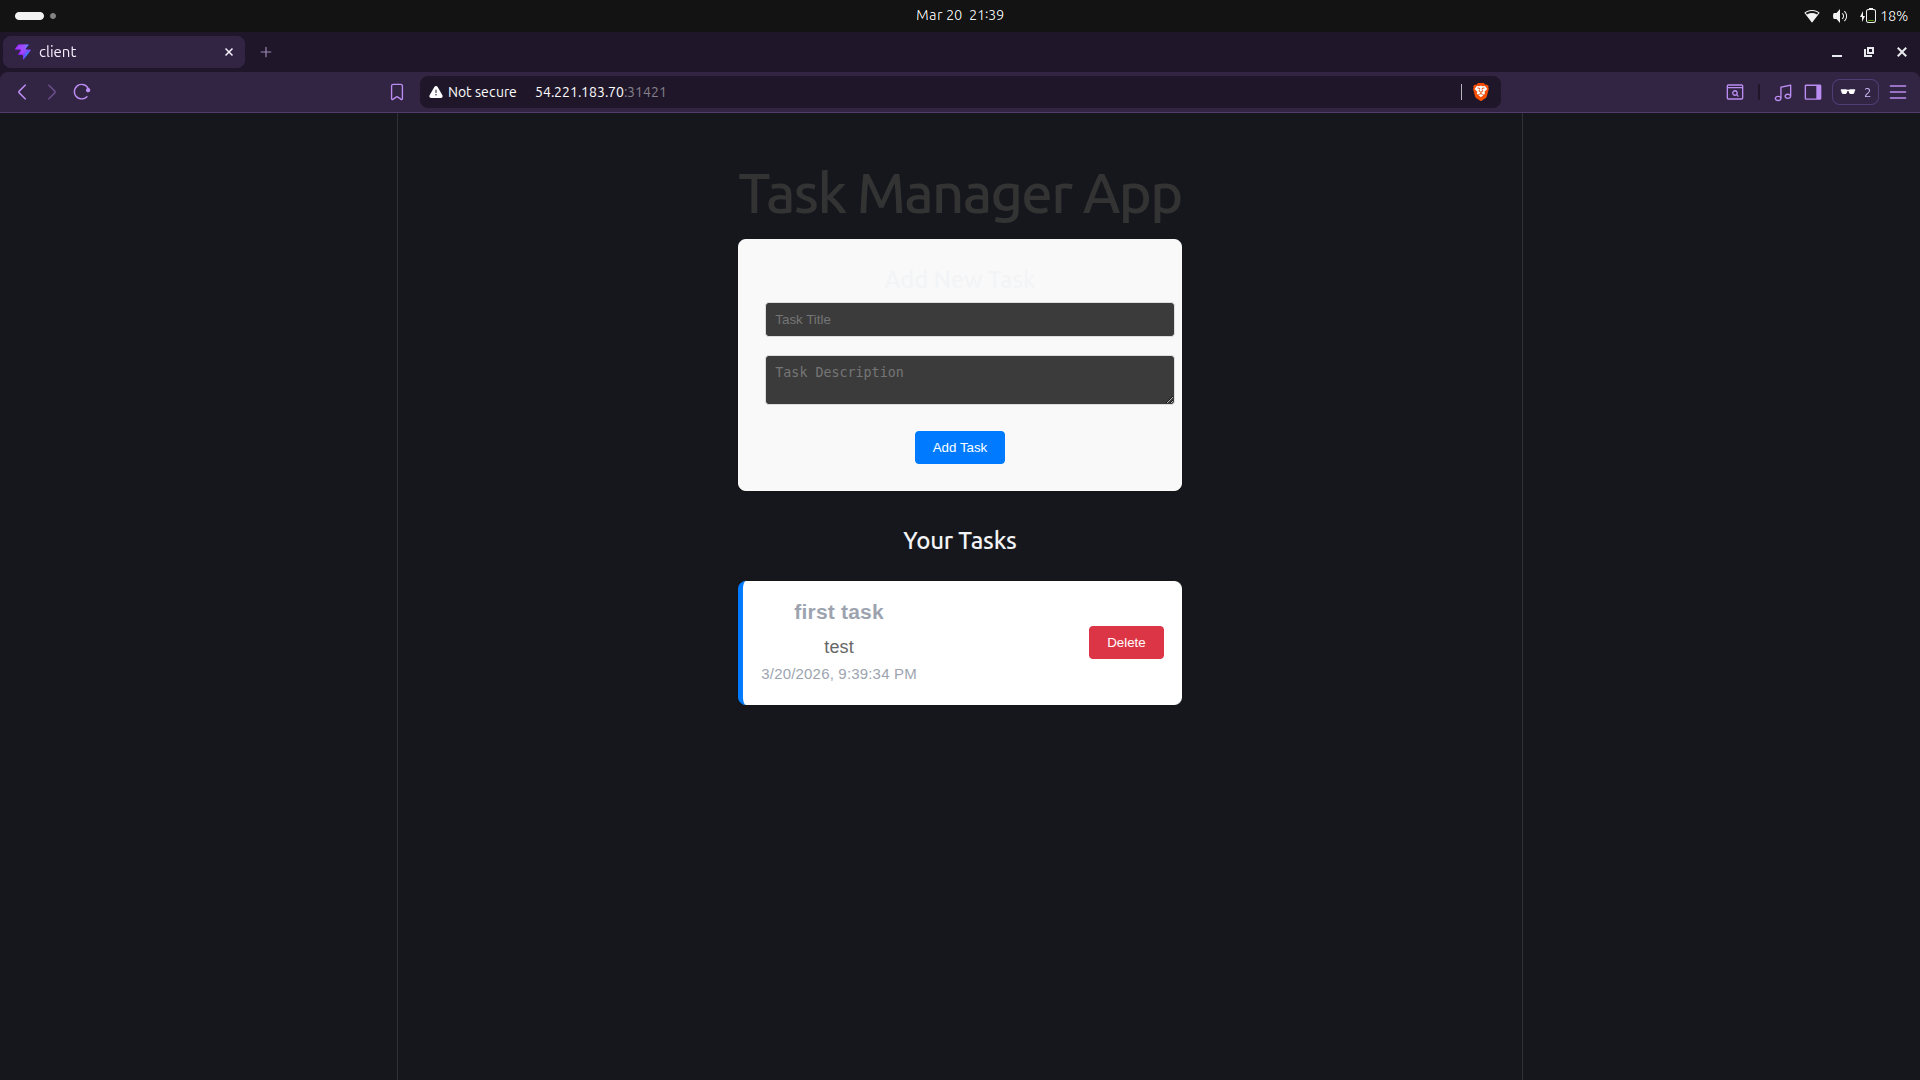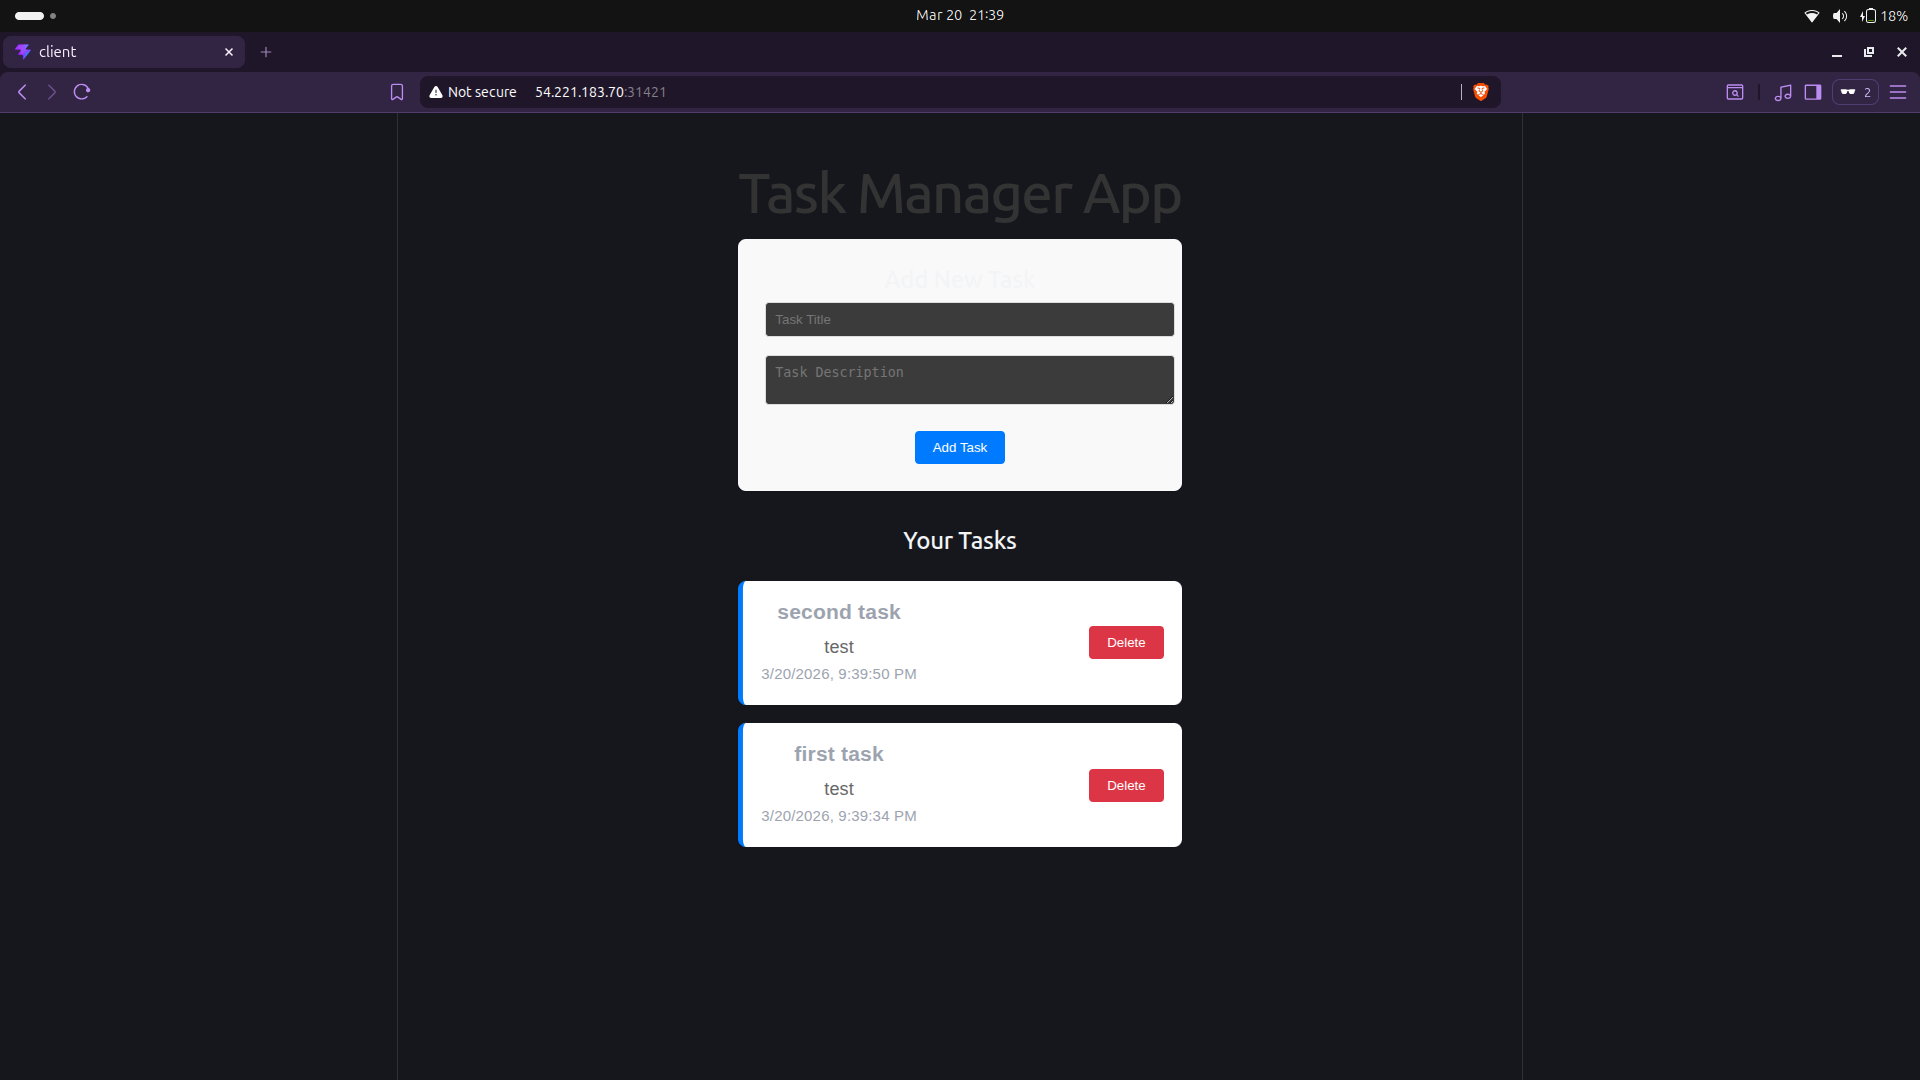
Deploying 3-Tier Application on Kubernetes
In this blog, I’ll walk you through how I deployed a 3-tier full-stack application on Kubernetes using kubeadm on AWS EC2. This includes setting up storage using the EBS CSI driver and exposing the application using an Ingress controller.
1. Architecture
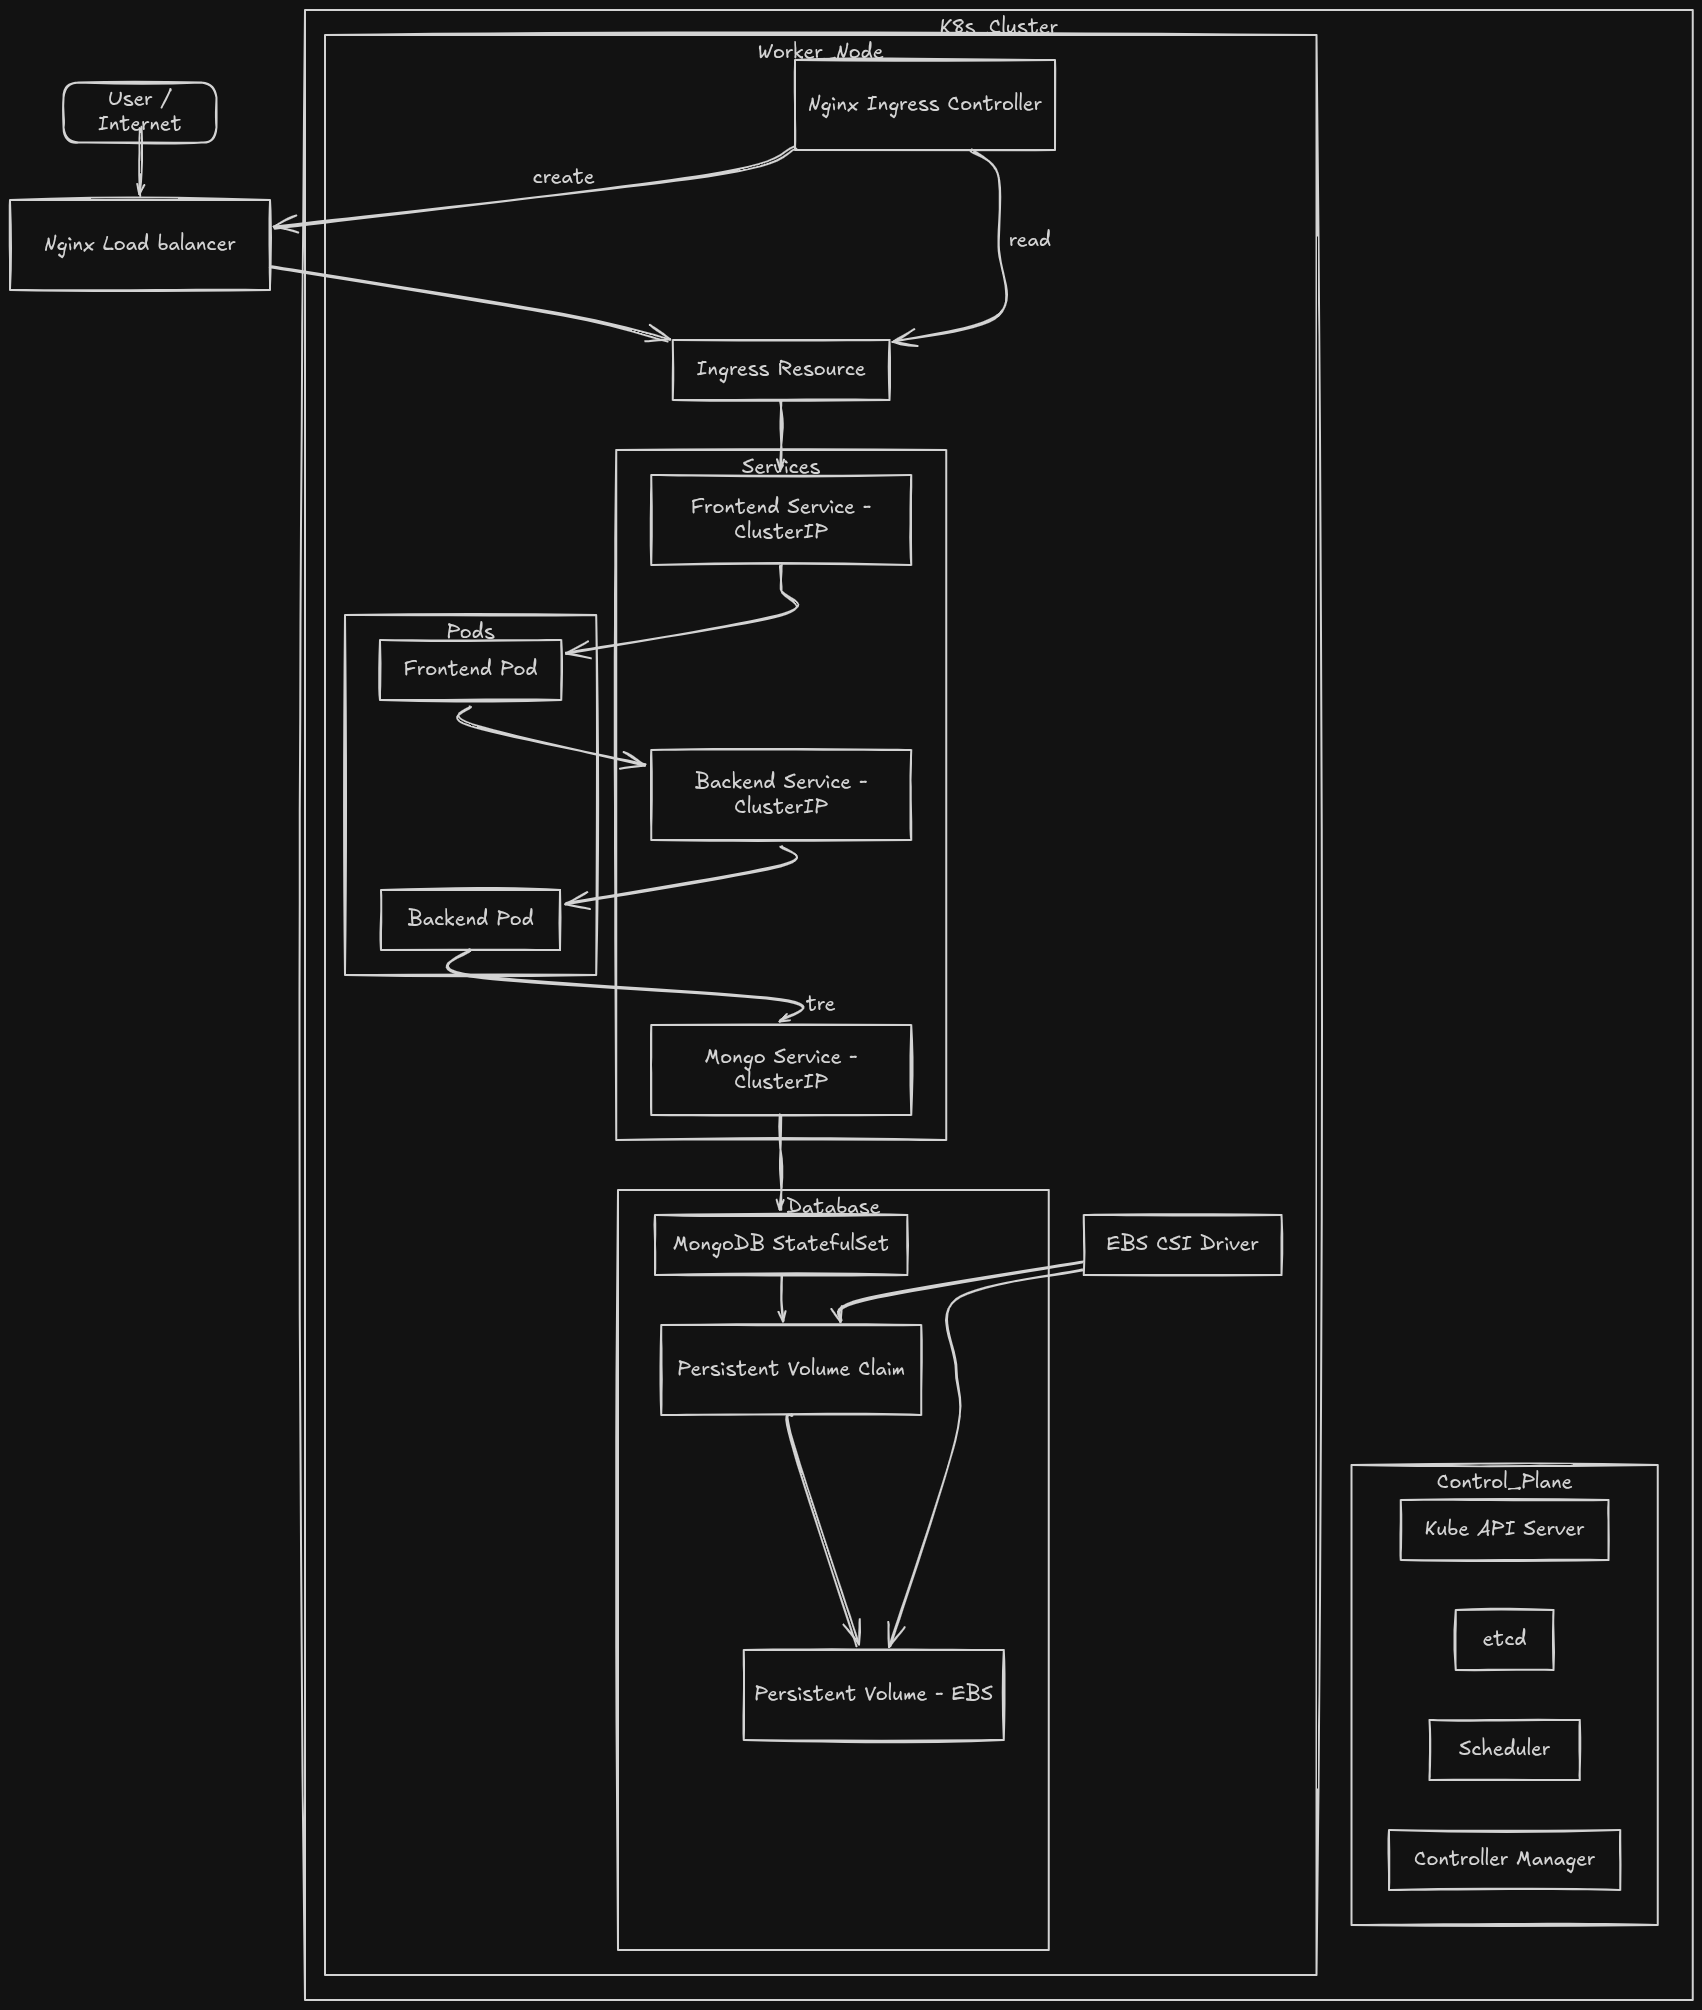
The application is deployed on a Kubernetes cluster set up using kubeadm on AWS EC2 infrastructure. The cluster consists of two EC2 instances: one acting as the control plane (master node) and the other as a worker node. The control plane manages the cluster state, scheduling, and API communication, while the worker node is responsible for running the application workloads in the form of pods.
Inside the Kubernetes cluster, the application follows a typical 3-tier architecture. The frontend (React application), backend (Node.js API), and database (MongoDB) are each deployed as separate pods. These pods are exposed internally using Kubernetes Services, which enable communication between different components. The frontend communicates with the backend service, and the backend interacts with the MongoDB database service.
To expose the application externally, an NGINX Ingress controller is configured. The Ingress resource routes incoming user traffic to the appropriate service within the cluster, allowing users to access the application through a single entry point instead of directly exposing NodePorts.
For persistent storage, especially for MongoDB, the AWS EBS CSI (Container Storage Interface) driver is used. This enables dynamic provisioning of EBS volumes, which are attached to the worker node and mounted inside the MongoDB pod using Persistent Volumes (PV) and Persistent Volume Claims (PVC). This ensures that database data is retained even if the pod restarts.
Overall, the request flow starts from the user, which is routed through the Ingress controller to the frontend service. The frontend then communicates with the backend API, which processes the request and interacts with the MongoDB database stored on an EBS-backed persistent volume.
2. Infrastructure Setup
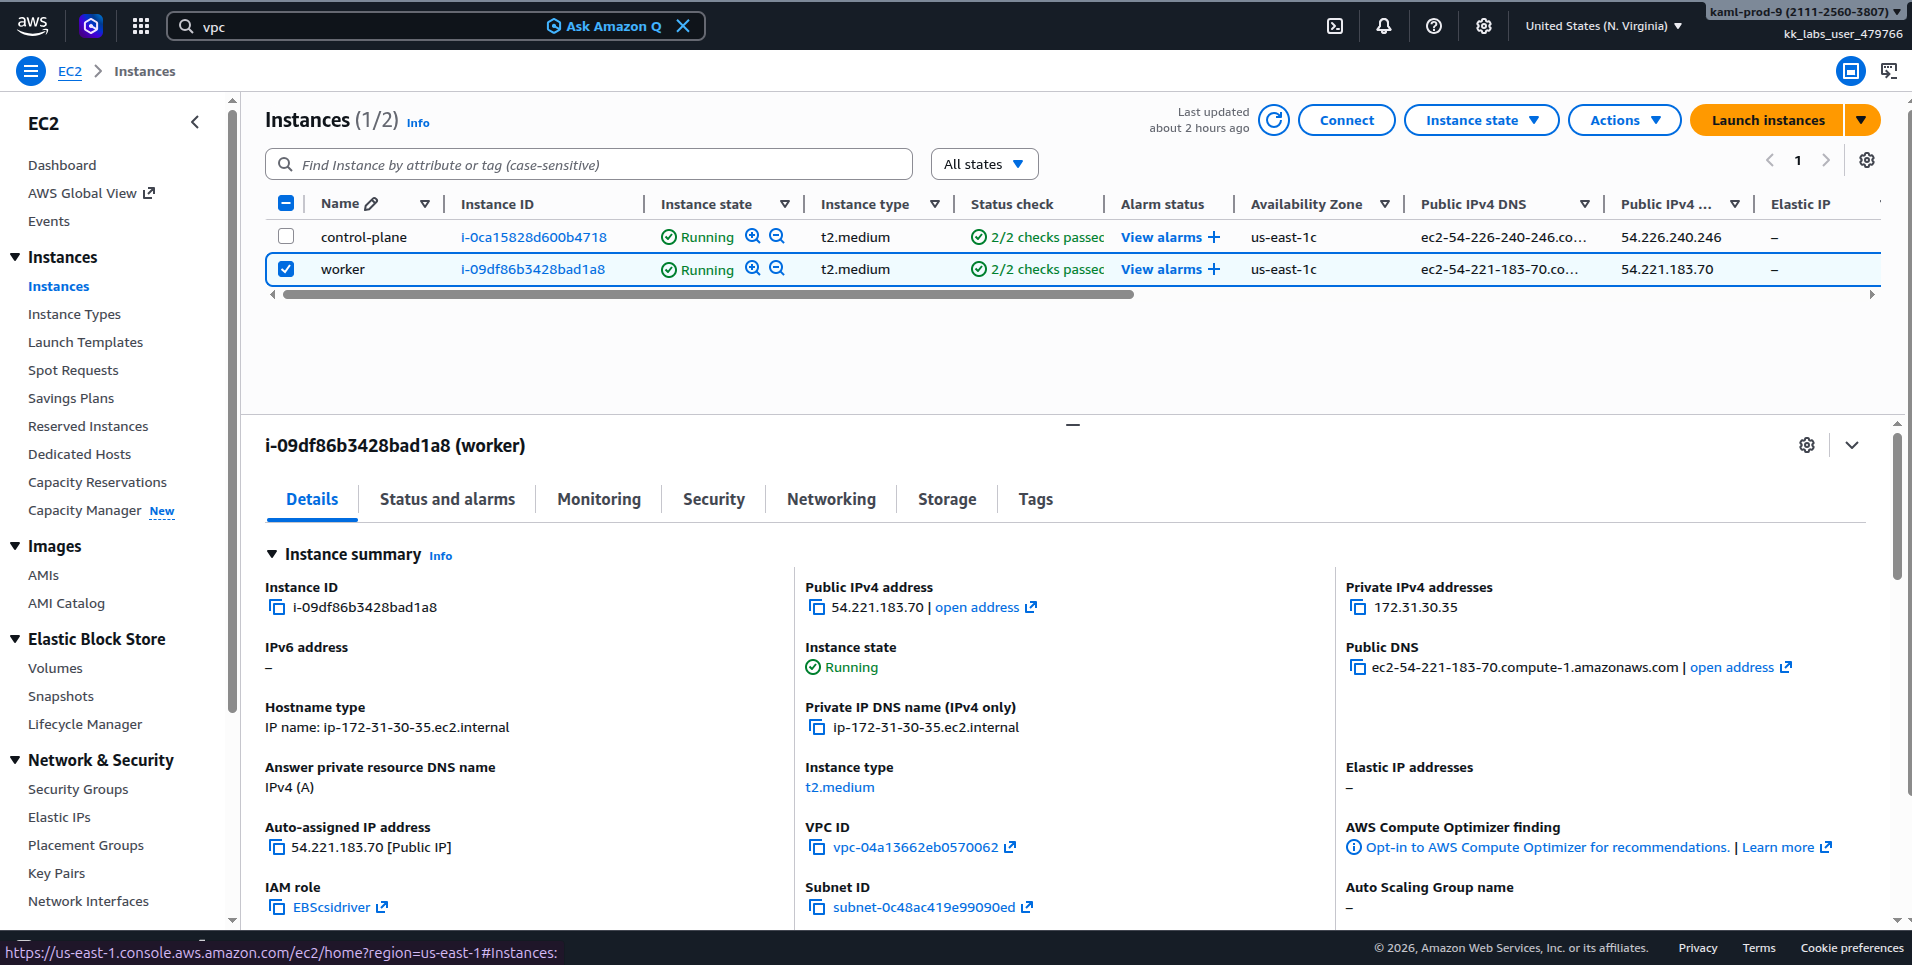
Created 2 EC2 instance (t2.medium) for control-plane and worker node in the default vpc.
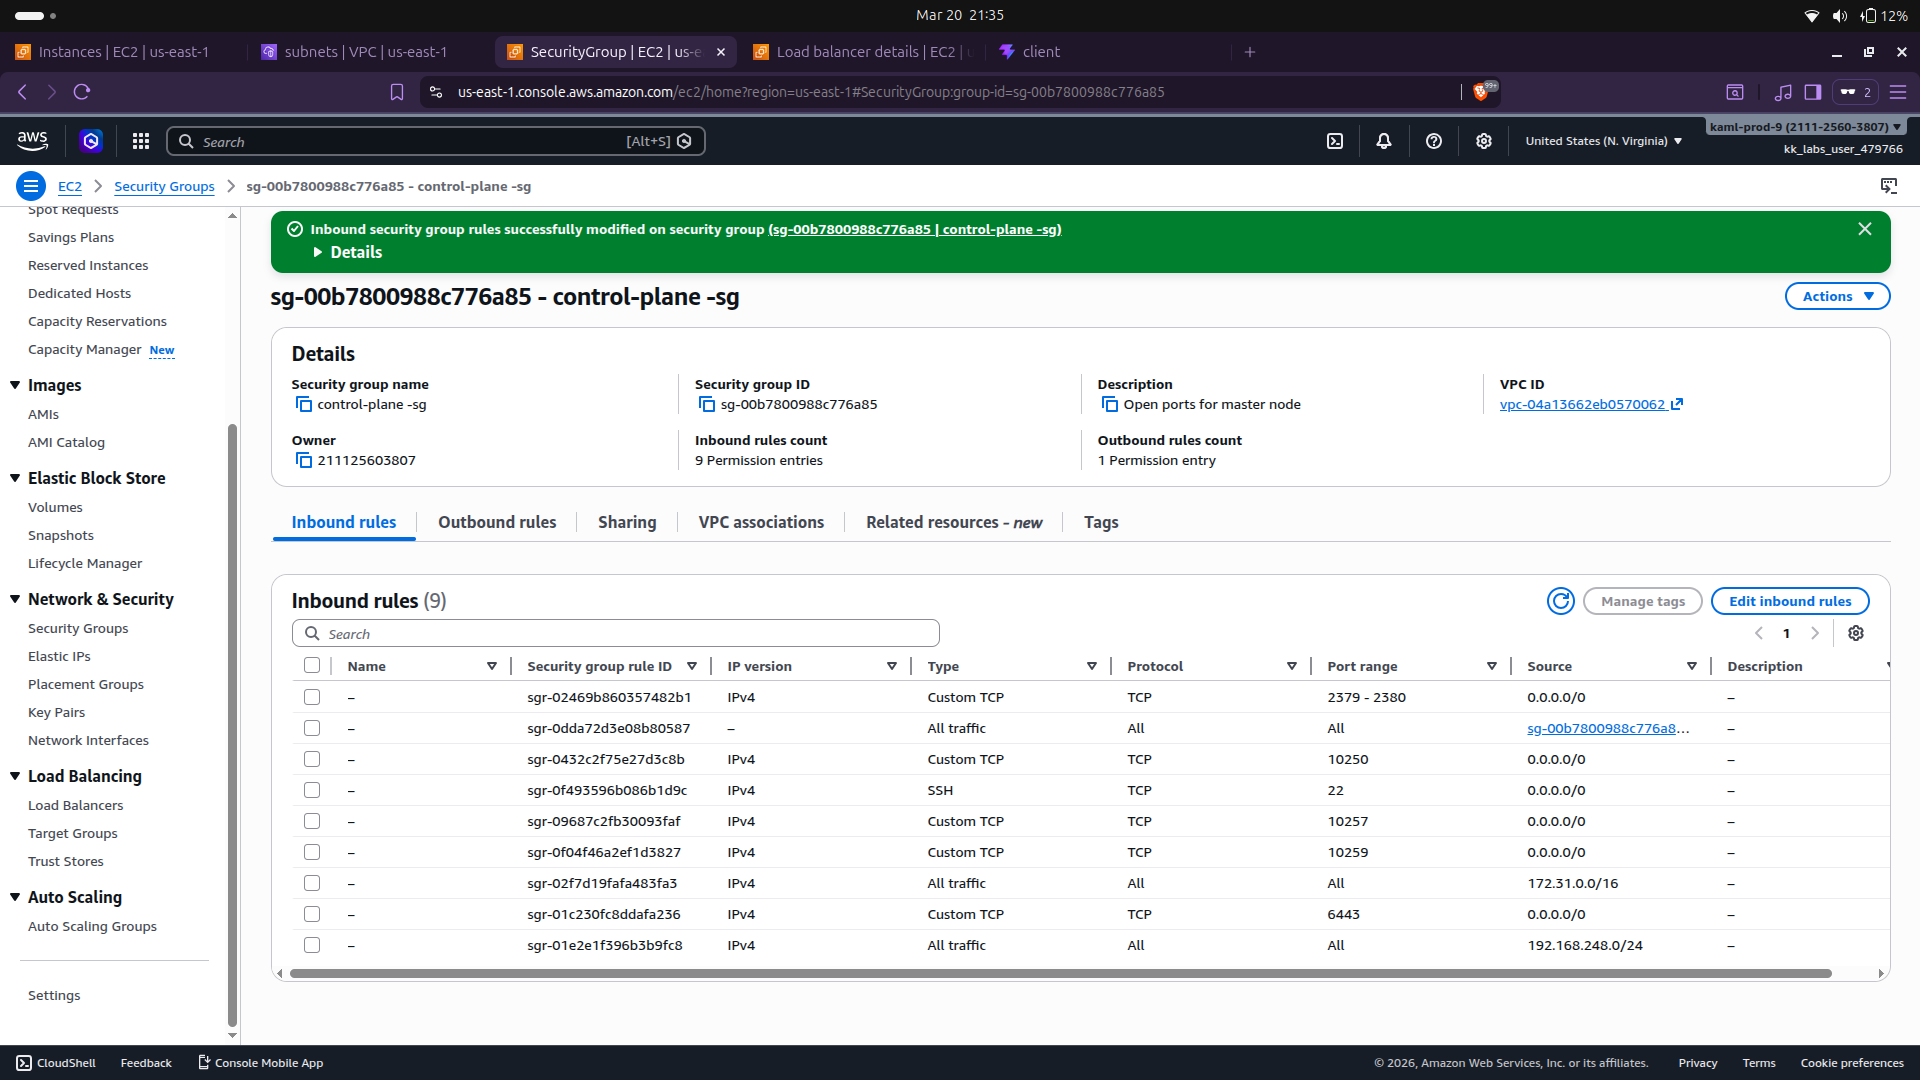
Security Group for control-plane node
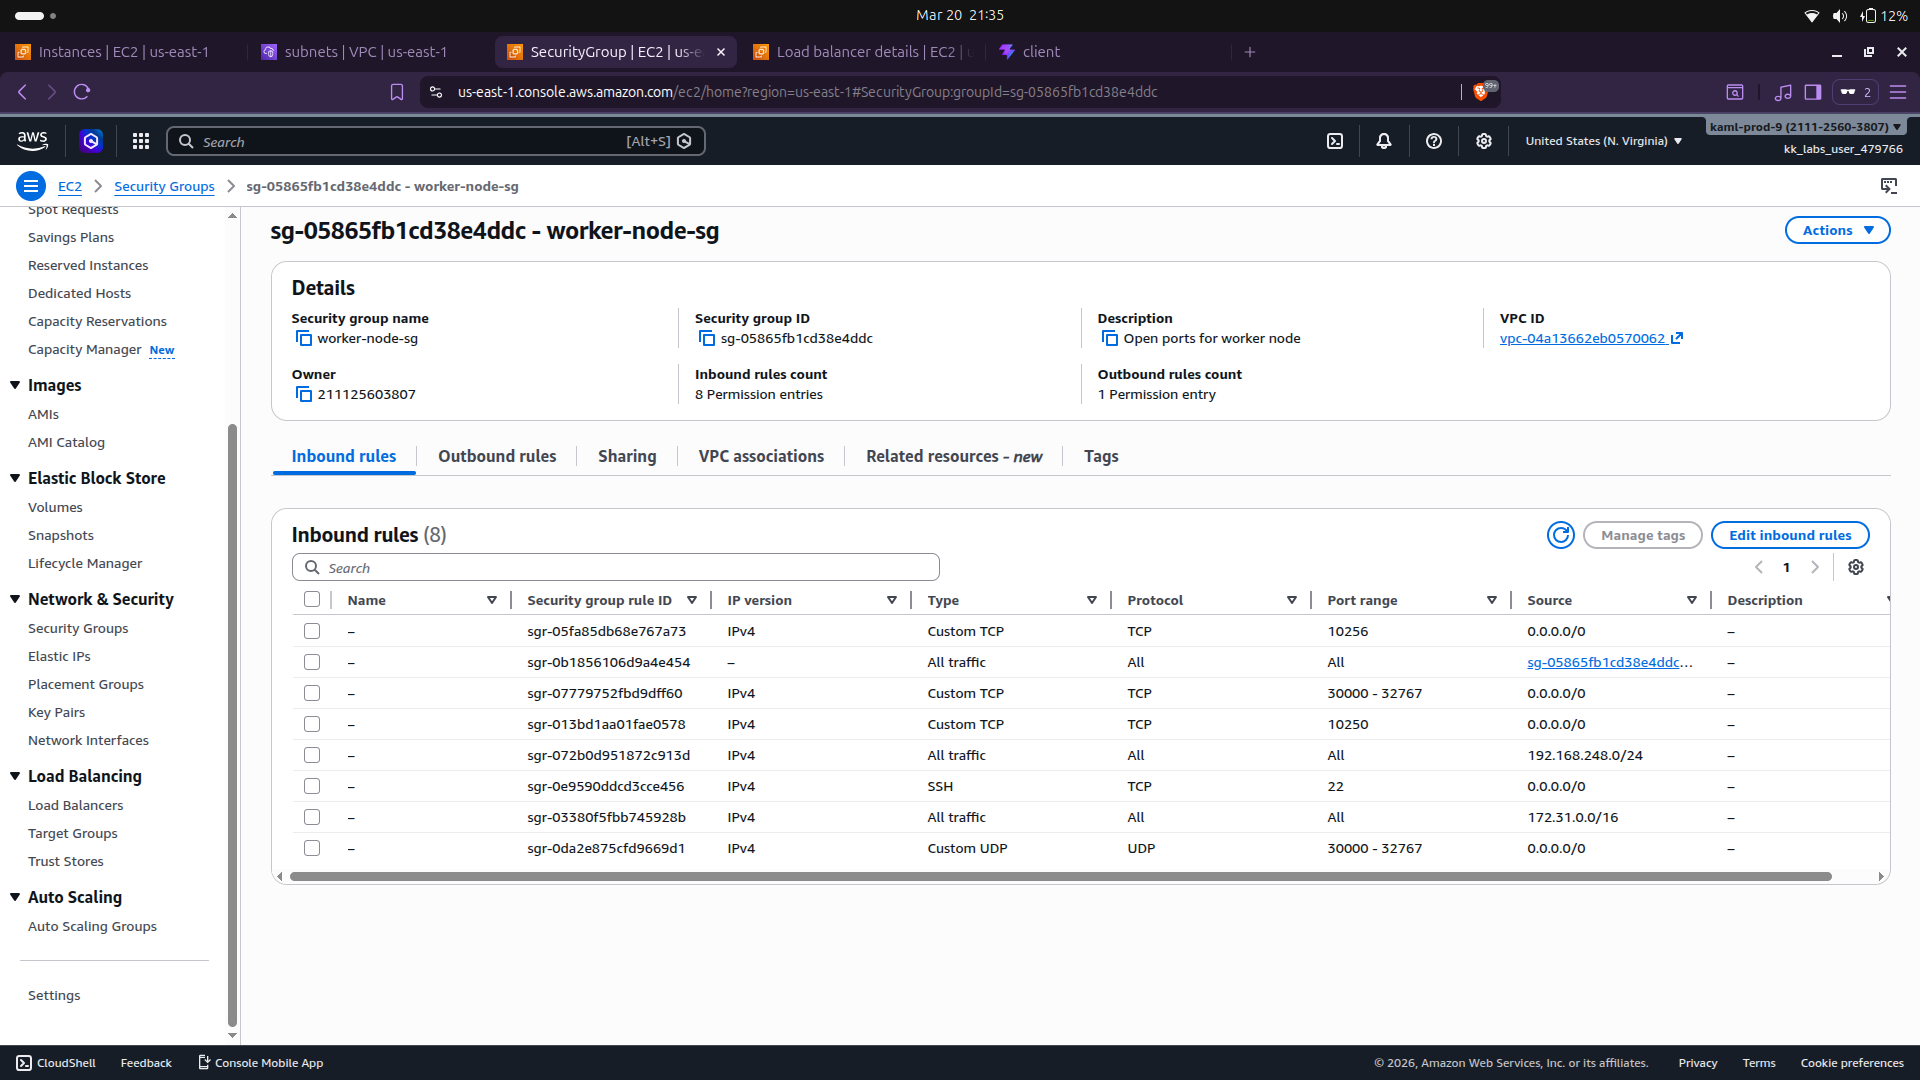
Security Group for worker node
4. Kubernetes Setup using kubeadm
Install dependencies
sudo apt update
sudo apt install -y docker.io
Install kubeadm, kubelet, kubectl in the same way , i'll mention how to do that in another blog
Initialize cluster (control-plane) kubeadm init
Join worker node kubeadm join ...
Install CNI (Calico) kubectl apply -f https://docs.projectcalico.org/manifests/calico.yaml
5. Setup Persistent Storage (EBS CSI Driver)
To make sure MongoDB data is not lost when pods restart, persistent storage is required. For this, the AWS EBS CSI driver was installed, which allows Kubernetes to create and attach EBS volumes dynamically to the pods. An IAM role with proper permissions was attached to the EC2 instances so that Kubernetes can interact with AWS services. Once configured, the CSI driver runs as pods inside the cluster and handles volume creation, attachment, and management automatically, ensuring reliable data persistence for the database.
Create IAM policy: AmazonEBSCSIDriverPolicy and attach it to both the ec2 nodes
Install EBS CSI Driver - kubectl apply -k "github.com/kubernetes-sigs/aws-ebs-csi-driver/deploy/kubernetes/overlays/stable/?ref=release-1.29"
Create a StorageClass
apiVersion: storage.k8s.io/v1
kind: StorageClass
metadata:
  name: ebs-sc
provisioner: ebs.csi.aws.com
volumeBindingMode: WaitForFirstConsumer
parameters:
  type: gp3
Create a secret to store the mongo creds
apiVersion: v1
kind: Secret
metadata:
  name: mongodb-secret
type: Opaque
data:
  MONGO_INITDB_ROOT_USERNAME: bW9uZ29hZG1pbg==   # mongoadmin
  MONGO_INITDB_ROOT_PASSWORD: cGFzc3dvcmQ=       # password
Since it is not the recommended way to store the secret. Use something called secret storage csi driver using AWS secret manager or Hashicorp vault and mount it into nodes to fetch the secrets.
Create a service for Mongodb
apiVersion: v1
kind: Service
metadata:
  name: mongodb
spec:
  clusterIP: None
  selector:
    app: mongodb
  ports:
    - port: 27017
Below is the manifest to create mongodb inside the nodes
apiVersion: apps/v1
kind: StatefulSet
metadata:
  name: mongodb
spec:
  serviceName: mongodb
  replicas: 1
  selector:
    matchLabels:
      app: mongodb
  template:
    metadata:
      labels:
        app: mongodb
    spec:
      containers:
      - name: mongodb
        image: mongo:6
        ports:
        - containerPort: 27017

        env:
        - name: MONGO_INITDB_ROOT_USERNAME
          valueFrom:
            secretKeyRef:
              name: mongodb-secret
              key: MONGO_INITDB_ROOT_USERNAME
        - name: MONGO_INITDB_ROOT_PASSWORD
          valueFrom:
            secretKeyRef:
              name: mongodb-secret
              key: MONGO_INITDB_ROOT_PASSWORD

        volumeMounts:
        - name: mongo-storage
          mountPath: /data/db

        resources:
          requests:
            cpu: "250m"
            memory: "512Mi"
          limits:
            cpu: "500m"
            memory: "1Gi"

        livenessProbe:
          exec:
            command:
              - mongosh
              - --eval
              - "db.adminCommand('ping')"
          initialDelaySeconds: 40
          timeoutSeconds: 5

        readinessProbe:
          exec:
            command:
              - mongosh
              - --eval
              - "db.adminCommand('ping')"
          initialDelaySeconds: 20
          timeoutSeconds: 5

  volumeClaimTemplates:
  - metadata:
      name: mongo-storage
    spec:
      accessModes: ["ReadWriteOnce"]
      storageClassName: ebs-sc
      resources:
        requests:
          storage: 5Gi
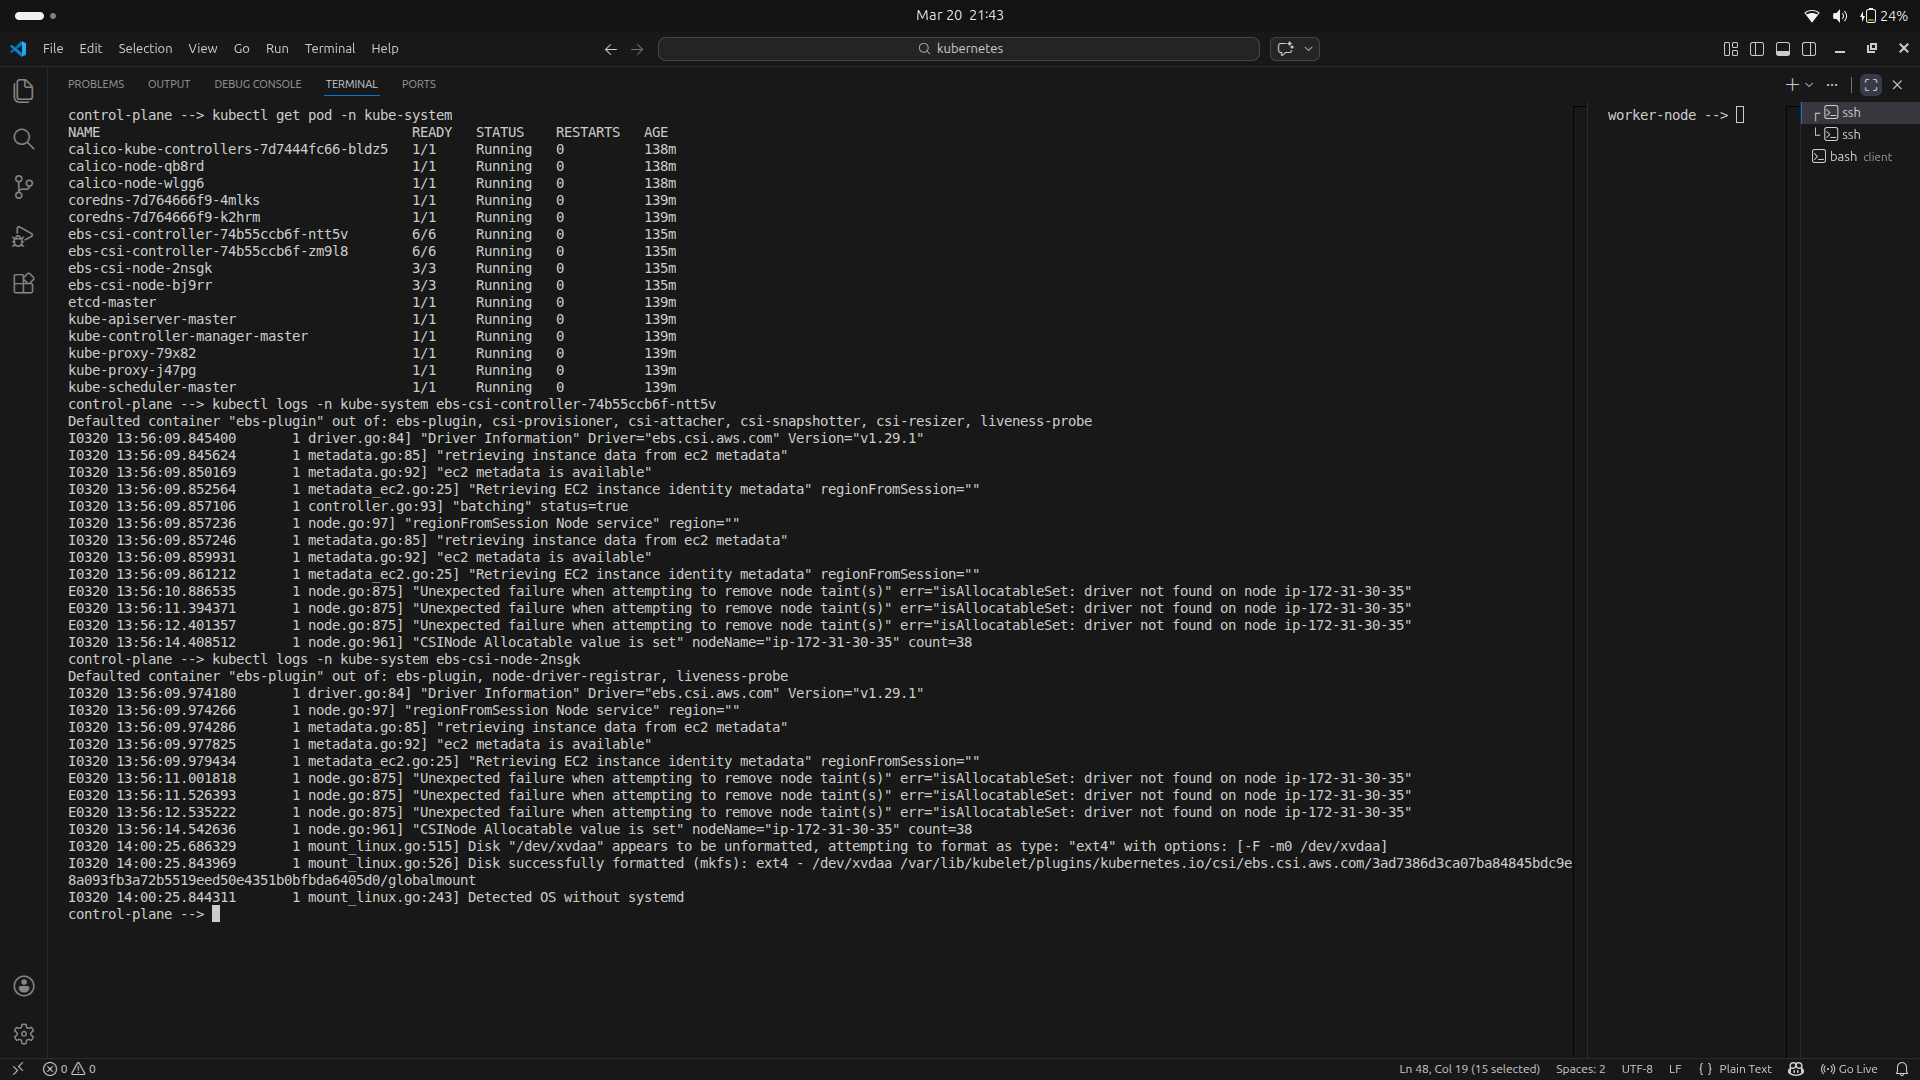
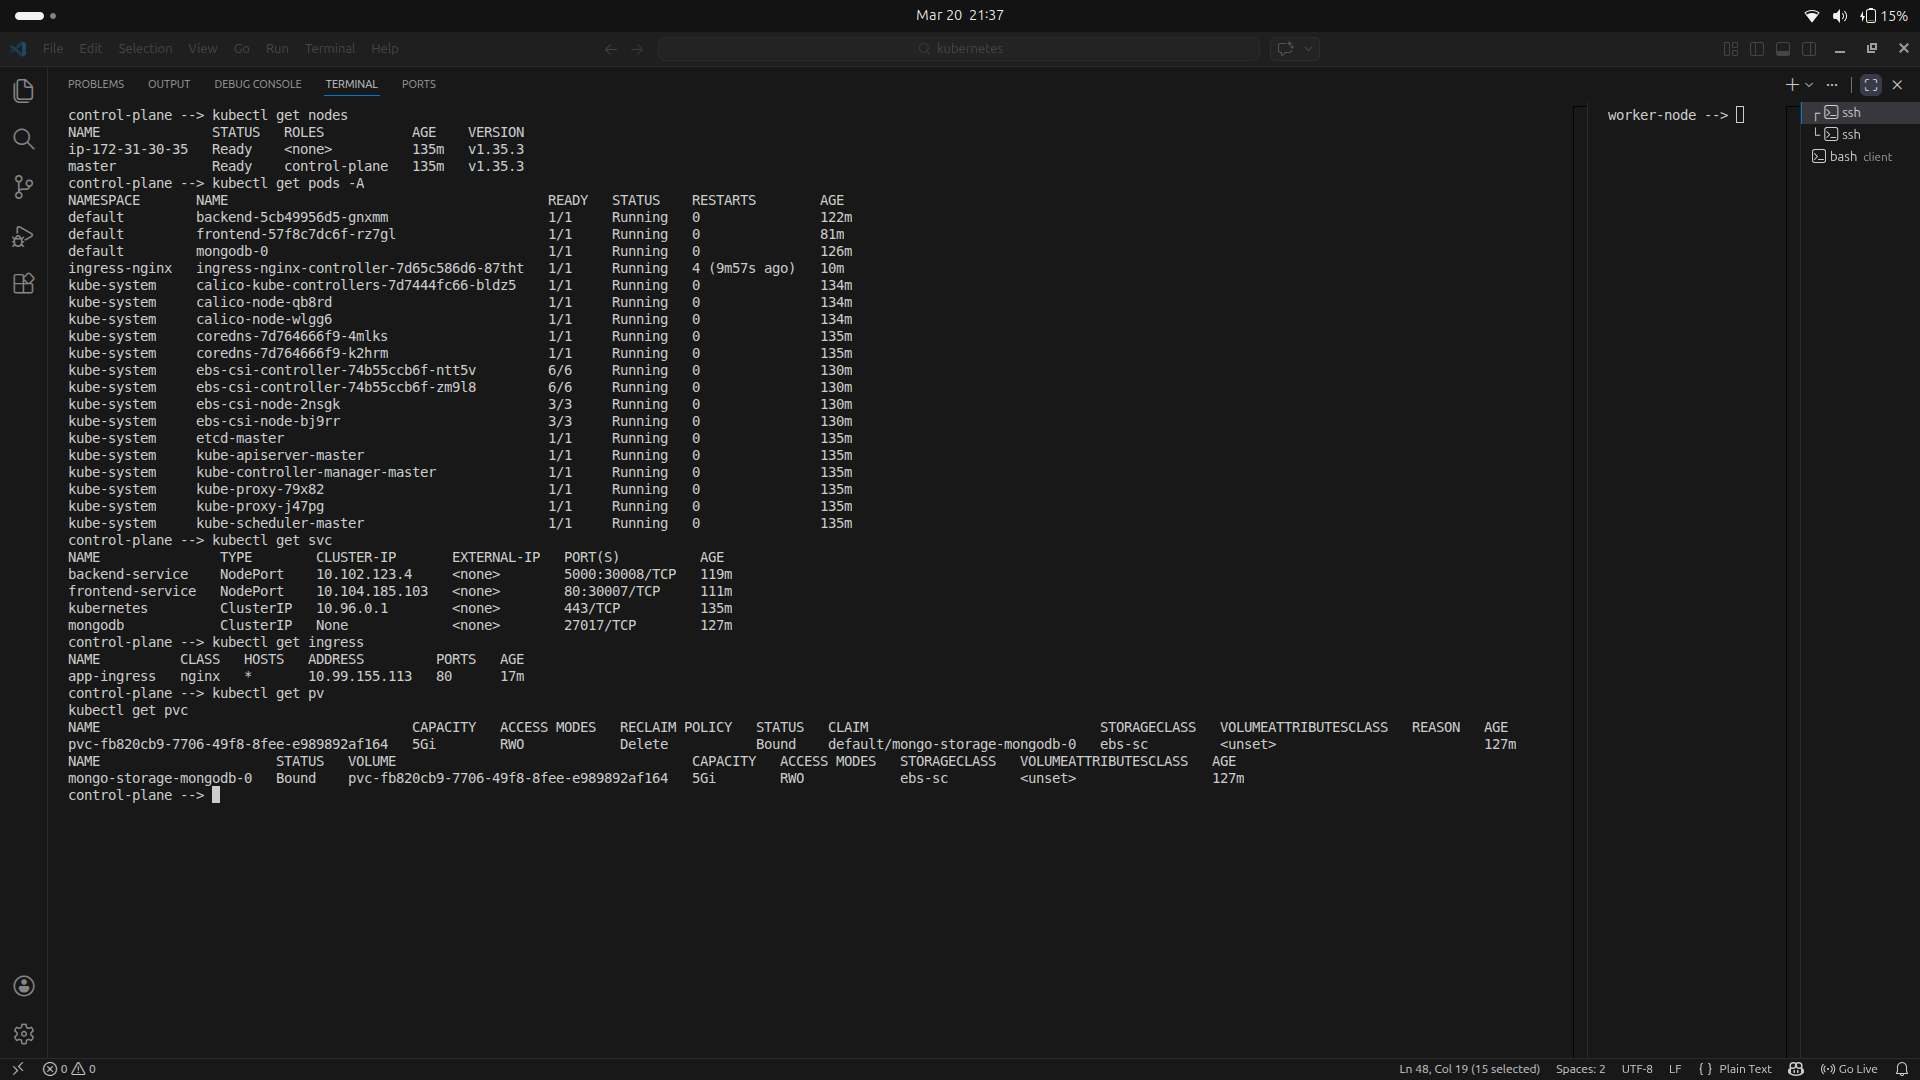
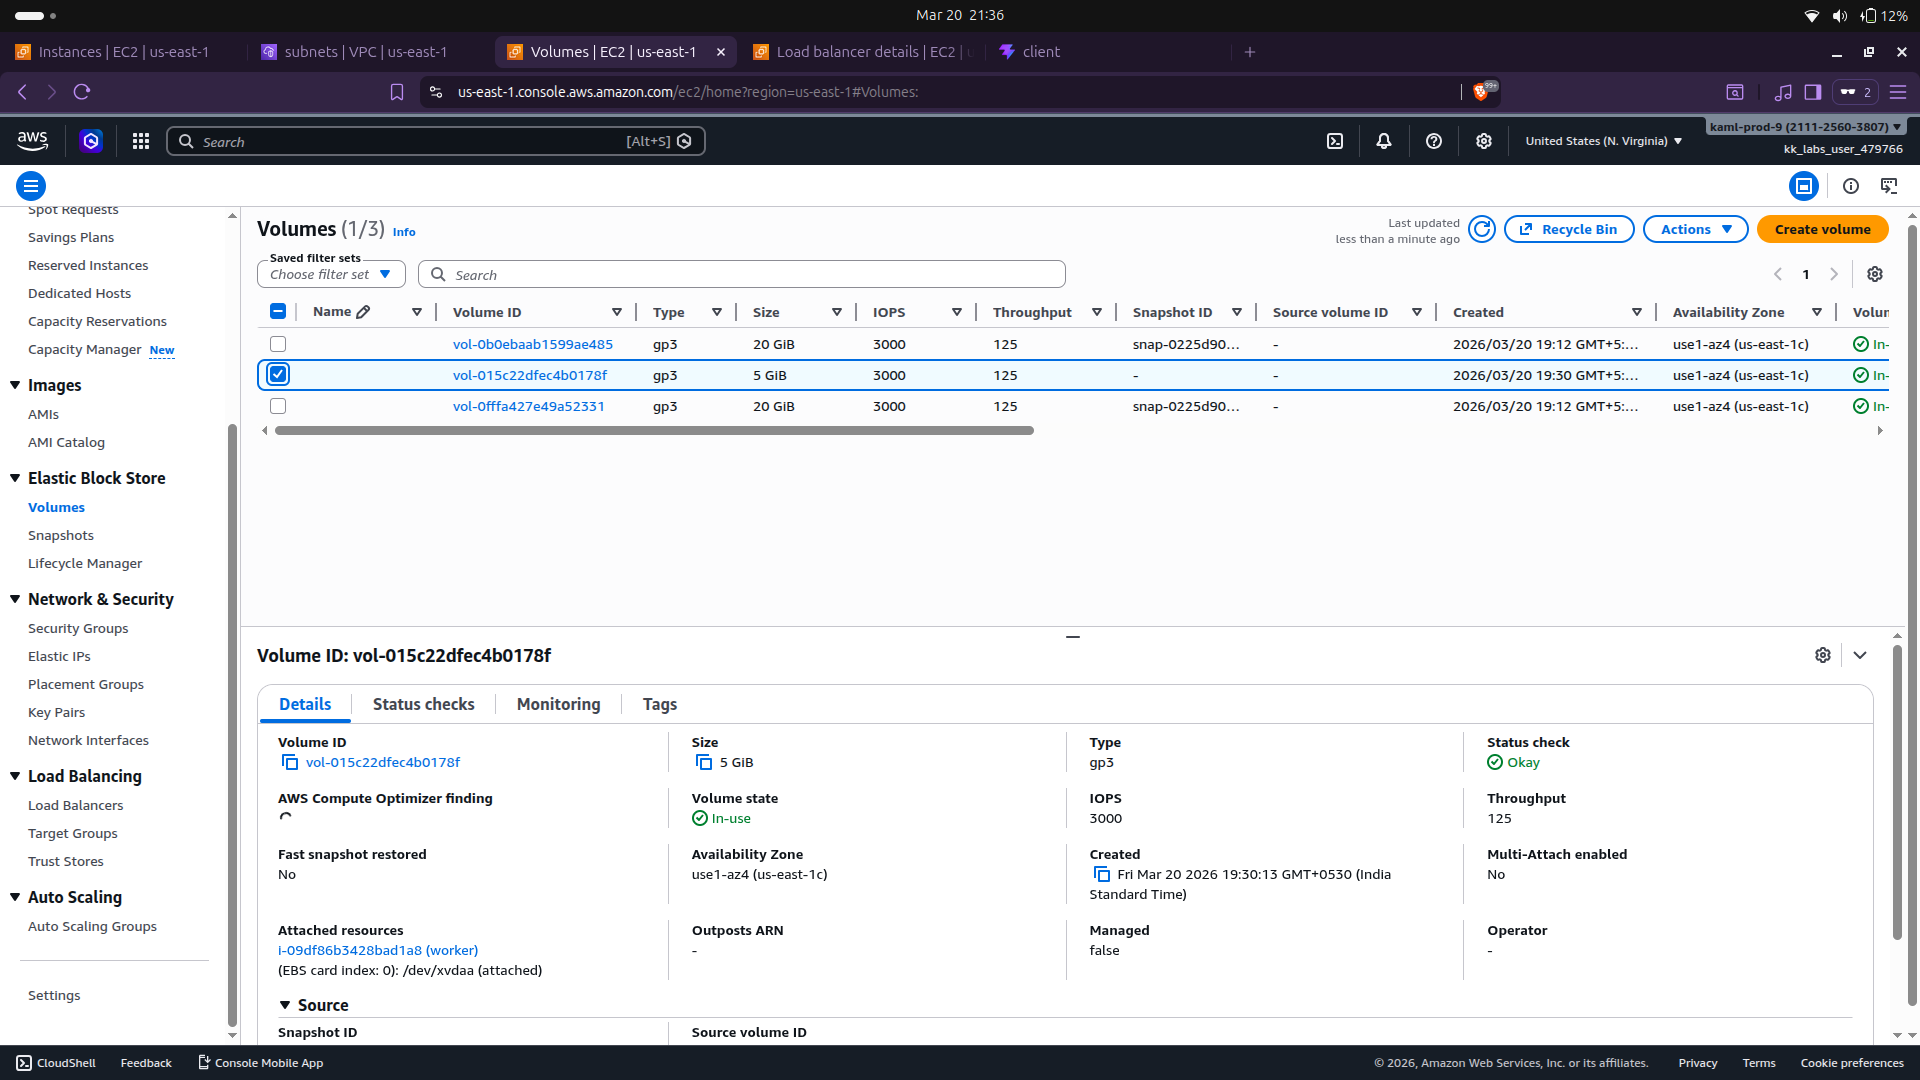
CSI Driver created volume automatically on PVC request
6. Backend & Frontend Deployment
Manifest for backend deployment
apiVersion: apps/v1
kind: Deployment
metadata:
  name: backend
spec:
  replicas: 1
  selector:
    matchLabels:
      app: backend
  template:
    metadata:
      labels:
        app: backend
    spec:
      tolerations:
      - key: "node.kubernetes.io/disk-pressure"
        operator: "Exists"
        effect: "NoSchedule"

      containers:
      - name: backend
        image: om6214/task-new-backend:latest
        imagePullPolicy: Always
        ports:
        - containerPort: 5000

        env:
        - name: MONGO_URI
          value: mongodb://mongoadmin:password@mongodb:27017/mydb?authSource=admin

        resources:
          requests:
            cpu: "100m"
            memory: "128Mi"
          limits:
            cpu: "300m"
            memory: "256Mi"
---
apiVersion: v1
kind: Service
metadata:
  name: backend-service
spec:
  selector:
    app: backend
  ports:
    - port: 5000
      targetPort: 5000
  type: ClusterIP
manifest for frontend deployment
apiVersion: apps/v1
kind: Deployment
metadata:
  name: frontend
spec:
  replicas: 1
  selector:
    matchLabels:
      app: frontend
  template:
    metadata:
      labels:
        app: frontend
    spec:
      containers:
      - name: frontend
        image: om6214/task-frontend:latest
        ports:
        - containerPort: 80
        env:
        - name: REACT_APP_API_URL
          value: http://backend-service:5000
---
apiVersion: v1
kind: Service
metadata:
  name: frontend-service
spec:
  selector:
    app: frontend
  ports:
    - port: 80
      targetPort: 80
  type: ClusterIP
8. Ingress Setup
Create IAM Policy
use this https://raw.githubusercontent.com/kubernetes-sigs/aws-load-balancer-controller/main/docs/install/iam_policy.json and name it AWSLoadBalancerControllerIAMPolicy
Attach policy to both EC2 nodes
Install ALB Load balancer controller
helm repo add eks https://aws.github.io/eks-charts helm repo update
helm install aws-load-balancer-controller eks/aws-load-balancer-controller \
  -n kube-system \
  --set clusterName=my-cluster \
  --set serviceAccount.create=true \
  --set region=us-east-1 \
  --set vpcId= vpc-id
next tag the subnets
Public subnets:
Key: kubernetes.io/role/elb
Value: 1
Private subnets:
Key: kubernetes.io/role/internal-elb
Value: 1
Create Ingress resource
apiVersion: networking.k8s.io/v1
kind: Ingress
metadata:
  name: app-ingress
  annotations:
    alb.ingress.kubernetes.io/scheme: internet-facing
    alb.ingress.kubernetes.io/target-type: ip
spec:
  ingressClassName: alb
  rules:
  - host: ""
    http:
      paths:
      - path: /
        pathType: Prefix
        backend:
          service:
            name: frontend-service
            port:
              number: 5000
the alb controller will watch this resource and create the alb load balancer
Issue Faced
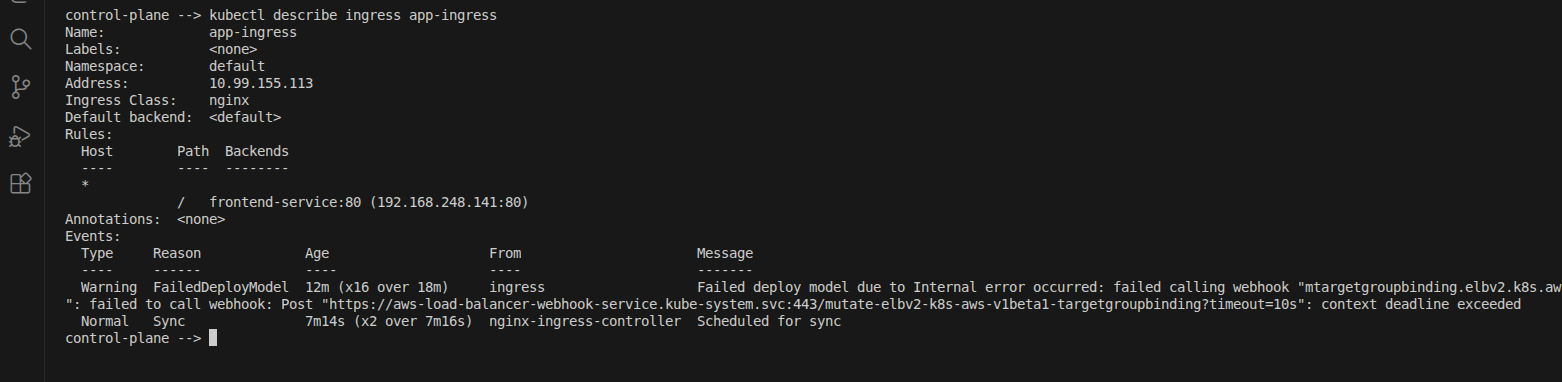
Webhook error:
failed calling webhook targetgroupbinding...
context deadline exceeded
While setting up Ingress, an error occurred related to a failed webhook call (targetgroupbinding.elbv2.k8s.aws) with a “context deadline exceeded” message. This happened because the AWS Load Balancer Controller components were partially present or expected, even though the cluster was created using kubeadm and not EKS. Since this setup does not require the AWS Load Balancer Controller, the webhook had no proper service to respond, causing the failure. The issue was resolved by ignoring or removing the unnecessary AWS Load Balancer Controller components and continuing with the NGINX Ingress controller, which works correctly in a kubeadm-based cluster.
9. Installing NGINX Ingress Controller
To expose the application to external users, the NGINX Ingress controller was installed in the Kubernetes cluster. This controller acts as a reverse proxy and routes incoming traffic to the appropriate services inside the cluster.
kubectl apply -f https://raw.githubusercontent.com/kubernetes/ingress-nginx/main/deploy/static/provider/cloud/deploy.yaml
verify it
kubectl get pods -n ingress-nginx
update ingress resource to use nginx controller instead of alb
apiVersion: networking.k8s.io/v1
kind: Ingress
metadata:
  name: app-ingress
spec:
  ingressClassName: nginx
  rules:
  - http:
      paths:
      - path: /
        pathType: Prefix
        backend:
          service:
            name: frontend-service
            port:
              number: 80
then access the application at http://:
! if the nginx svc is in LoadBalancer type change it to NodePort type for testing.
RESULT